


- Nutrient deficiencies affect an estimated 60–70% of first-time cannabis growers, with nitrogen deficiency being the single most reported issue.
- Spider mites can destroy an entire cannabis crop in as little as 5–7 days under warm, dry conditions if left untreated.
- Overwatering is the #1 cultivation mistake — cannabis roots need a wet/dry cycle to uptake oxygen effectively; soggy soil kills more plants than drought.
- Root pH imbalances outside the 5.5–7.0 (soil) or 5.5–6.5 (hydro) range are responsible for the majority of nutrient lockout problems seen in both amateur and professional grows.
- According to the CDC, cannabis-related emergency visits have increased as potency rises — many linked to overconsumption from underestimating edible doses.
- Powdery mildew (PM) thrives at 50–70°F with humidity above 55% and can spread across an entire grow room in under 72 hours without intervention.
- Light burn and heat stress account for up to 30% of indoor yield loss among hobbyist growers using high-intensity LED or HPS lighting systems.
Understanding Cannabis Growing Problems: Where Issues Begin
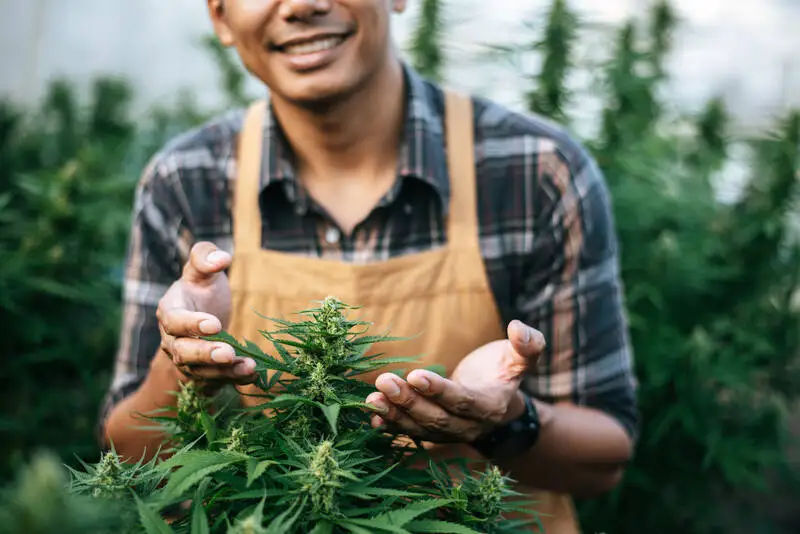
Every cannabis grower — whether a home hobbyist tending three plants or a licensed commercial cultivator managing thousands — will eventually face common growing problems. The difference between a thriving harvest and a disappointing one often comes down to early diagnosis and swift action. Cannabis is a resilient plant, but it communicates stress through very specific visual and physical cues. Learning to read those cues accurately is the foundation of successful cultivation.
Problems in the cannabis garden rarely emerge in isolation. A pH imbalance can cause what looks like a nutrient deficiency. A pest infestation can mimic environmental stress. Overwatering can create the same yellowing leaves as a nitrogen shortage. This interconnected nature of cannabis issues is precisely why growers need a systematic, top-to-bottom diagnostic approach rather than a reactive, single-symptom fix. For comprehensive growing guidance, explore our full cannabis growing resource center.
Why Early Detection Matters So Much
Cannabis plants in vegetative and flowering stages are remarkably responsive to their environment. A problem identified in its first 24–48 hours is almost always correctable with minimal impact on yield and quality. The same problem ignored for a week can set back a plant by two to three weeks of healthy growth — and in some cases, the damage simply cannot be undone. In practice, experienced growers develop a daily inspection ritual: scanning leaf color, checking soil moisture, examining the undersides of leaves for pests, and monitoring environmental readings like temperature, humidity, and CO₂ levels. This habit — taking no more than ten minutes a day — separates growers who consistently produce quality yields from those who are constantly firefighting.
Most growers find that keeping a simple grow journal — even a basic notes app on your phone — makes an enormous difference. Logging observations daily allows you to spot trends before they become full-blown crises. If leaf color has been slowly shifting over five days, that's far easier to catch in a journal than by memory alone.
Setting Up a Diagnostic Framework
Before diving into specific problems, it helps to build a mental checklist every grower should run through when something looks wrong. Jumping to conclusions and applying the wrong fix can compound the original problem significantly. A structured diagnostic process looks like this:
- Check the water and pH first — most problems trace back to water quality or pH being out of range.
- Examine the growing medium — is the soil compacted, waterlogged, or bone dry?
- Review your feeding schedule — have you recently changed nutrients or dosage?
- Inspect for pests — use a 60x jeweler's loupe to check leaf undersides and stem junctions.
- Log your environment — temperature, humidity, and light intensity all play roles in plant health.
- Assess recent changes — a new light, a different water source, or a change in grow medium can trigger cascading problems.
This systematic approach prevents growers from chasing symptoms with expensive solutions when the root cause is something simple and free to fix. It also ensures you don't over-correct — adding more nutrients when a pH flush is all that's needed, for example, can quickly turn a minor issue into a major one.
- Cannabis problems rarely occur in isolation — always investigate root causes before treating symptoms.
- Daily inspections lasting just 10 minutes can catch most problems before they become crop-threatening.
- A grow journal helps identify slow-developing trends invisible to daily observation alone.
- Always run through a full diagnostic checklist — pH, moisture, feeding history, pests, and environment — before applying any fix.
- Over-correcting a misdiagnosed problem can be more damaging than the original issue itself.
Nutrient Deficiencies and Toxicities in Cannabis
Nutrient problems are arguably the most misdiagnosed issues in cannabis cultivation. Deficiencies look strikingly similar to toxicities in some cases, and both can be caused or worsened by a pH that is simply out of range — even when the nutrients themselves are present in the growing medium. Understanding the difference between a true deficiency and a lockout is critical to applying the correct fix without making the situation worse.
Cannabis requires a blend of macronutrients (nitrogen, phosphorus, potassium), secondary nutrients (calcium, magnesium, sulfur), and a range of micronutrients (iron, manganese, zinc, boron, and others). Each nutrient plays a distinct role at different stages of the plant's life cycle. Nitrogen fuels vegetative growth, phosphorus drives root development and flowering, and potassium regulates water movement and overall plant health. Understanding which nutrient does what — and when — allows growers to tailor feeding schedules to the plant's actual needs at each growth stage, rather than applying a one-size-fits-all approach. For strain-specific feeding considerations, our strain library includes cultivation notes on many popular varieties.
The Most Common Deficiencies: Nitrogen, Calcium, and Magnesium
Nitrogen deficiency is the most frequently encountered problem, especially in mid-to-late veg and early flower. It presents as a uniform yellowing that starts on the oldest, lowest leaves and works its way up the plant. This upward progression is a key diagnostic marker — if yellowing starts at the top of the plant, nitrogen is rarely the culprit. Calcium deficiency shows up differently — typically as brown, crispy spots on newer growth, often accompanied by leaf curl and claw. Magnesium deficiency creates interveinal chlorosis, meaning the veins stay green while the tissue between them turns yellow, usually starting on mid-canopy leaves and progressing outward from the center of the leaf.
From real-world growing experience, cal-mag deficiency is dramatically underdiagnosed — especially among growers using reverse osmosis (RO) water, which strips naturally occurring calcium and magnesium from the supply. If you're using RO water without a cal-mag supplement as a baseline additive, you are almost certainly running into preventable deficiencies.
- Nitrogen (N) deficiency: Yellowing starts at lower/older leaves, progresses upward. Fix with a nitrogen-rich top dress or liquid feed.
- Calcium (Ca) deficiency: Brown spots and tip burn on newer leaves. Fix with calcium-magnesium (Cal-Mag) supplement.
- Magnesium (Mg) deficiency: Interveinal chlorosis on mid-plant leaves. Fix with Epsom salts (1 tsp/gallon) or Cal-Mag.
- Iron (Fe) deficiency: Bright yellow new growth with green veins. Usually a pH issue — lower soil pH to 6.0–6.5.
- Phosphorus (P) deficiency: Purpling of stems and leaf undersides, dark green leaves curling. Most common in cold root zones below 60°F.
Nutrient Toxicity: When More Becomes a Problem
Overfeeding is just as damaging as underfeeding, and it is an extremely common mistake among newer growers who believe more nutrients always means faster growth. Nutrient burn — the most common toxicity — appears first as clawing leaf tips that turn brown and crispy, often described as "the claw" when nitrogen toxicity is severe. It's caused by excessive fertilizer salts accumulating in the growing medium, which draws water out of root cells through osmotic pressure rather than allowing roots to take it in. The fix is to flush with plain, pH-balanced water: use 2–3 times the pot volume in water to clear out salt buildup. Always return to a lower feeding strength — typically 50% of the previous dose — after flushing, and rebuild gradually over the following week.
pH Lockout: The Hidden Cause Behind Most Nutrient Problems
Before adjusting nutrients, always verify your root zone pH. Each nutrient has a specific pH window in which it becomes available to plant roots. When pH drifts outside that window — even slightly — plants cannot absorb certain nutrients regardless of how much is present in the medium. This phenomenon, known as nutrient lockout, is responsible for the vast majority of deficiency-like symptoms in well-fed plants. Test your runoff or reservoir water with a calibrated digital pH meter — not cheap pH drops, which are notoriously inaccurate — and adjust accordingly using pH-up or pH-down solutions. Recalibrate your meter monthly with proper calibration solution to ensure accuracy over time.
| Nutrient | Deficiency Symptoms | Optimal Soil pH | Optimal Hydro pH | Quick Fix |
|---|---|---|---|---|
| Nitrogen (N) | Pale/yellow older leaves, upward spread | 6.0–7.0 | 5.5–6.5 | Liquid nitrogen fertilizer, fish emulsion |
| Phosphorus (P) | Purple stems, dark green curling leaves | 6.0–7.0 | 5.5–6.2 | Warm root zone, phosphorus-rich bloom feed |
| Potassium (K) | Brown leaf edges, weak stems, slow growth | 6.0–7.0 | 5.5–6.5 | Potassium supplement, kelp meal top dress |
| Calcium (Ca) | Brown spots, tip burn on new growth | 6.2–7.0 | 5.5–6.5 | Cal-Mag supplement, dolomite lime amendment |
| Magnesium (Mg) | Interveinal chlorosis mid-plant | 6.0–7.0 | 5.5–6.5 | Epsom salts (1 tsp/gal), Cal-Mag supplement |
| Iron (Fe) | Yellow new growth with green veins | 6.0–6.5 | 5.5–6.0 | Lower pH, chelated iron supplement |
| Sulfur (S) | Pale yellow new leaves, stunted growth | 6.0–7.0 | 5.5–6.5 | Epsom salts, sulfur-containing base nutrients |
- Nutrient deficiencies are the most misdiagnosed cannabis problem — always confirm root zone pH before adjusting feed.
- Nitrogen deficiency is the most common issue, presenting as yellowing that progresses upward from older leaves.
- Cal-Mag deficiency is especially prevalent among growers using reverse osmosis water without supplementation.
- Nutrient burn (overfeeding) appears as brown, crispy leaf tips — flush with 2–3x pot volume of pH-balanced water.
- pH lockout can mimic virtually any deficiency; calibrate your pH meter monthly and always test after mixing nutrients.
Pests and Diseases: Identifying and Eliminating Threats
Few things devastate a cannabis grow faster than a full-blown pest infestation or fungal outbreak. Pests and diseases can arrive silently — hitchhiking on clothing, through intake fans, or on clones from unknown sources — and establish themselves before growers notice a single symptom. The best strategy is always prevention first, treatment second. Implementing robust integrated pest management (IPM) protocols from day one dramatically reduces the risk and severity of outbreaks. For more on legally compliant cultivation in your region, check our cannabis laws by state guide and our state-by-state growing regulations.
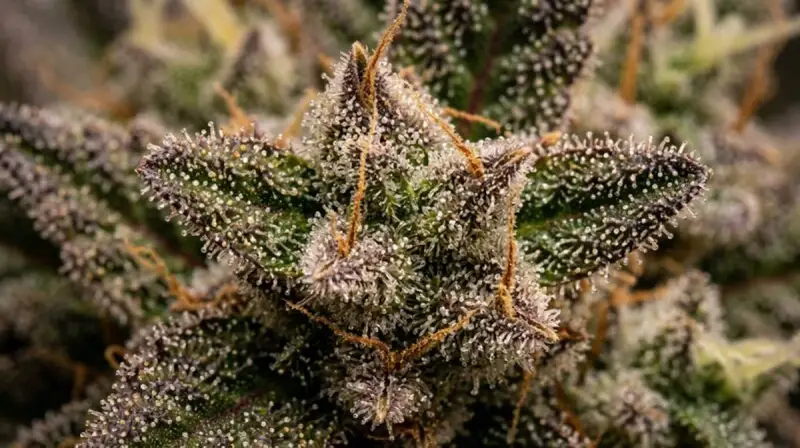
Spider Mites, Fungus Gnats, and Aphids
Spider mites are the most feared cannabis pest among indoor cultivators. Invisible to the naked eye individually, they appear as tiny moving dots on leaf undersides, and their feeding creates a distinctive stippled, bronze appearance on upper leaf surfaces. Severe infestations produce visible webbing between stems and leaves. They reproduce explosively in hot, dry conditions — a single female can lay up to 300 eggs in her lifetime, and eggs can hatch in as few