Cannabis Cultivation Specialist at ZenWeedGuide. Expert in strain genetics, terpene profiles, and optimized growing techniques.
Last reviewed: May 2026
KEY FACTS
Primary species:Tetranychus urticae (two-spotted spider mite) — most common in indoor cannabis grows worldwide
Russet mites:Aculops cannabicola — microscopic, no webbing, causes upward leaf curl and bronzing
Reproduction speed: One female lays up to 200 eggs; populations double every 3–5 days at 80°F / 45% RH
Detection threshold: Use 30× loupe minimum for spider mites; 60–100× for russet mites
VPD deterrent range: 0.8–1.2 kPa (veg), 1.0–1.5 kPa (flower) — keeps temps and humidity hostile to mites
Treatment window: Begin at first stippling; delay beyond Level 2 infestation dramatically reduces success rate
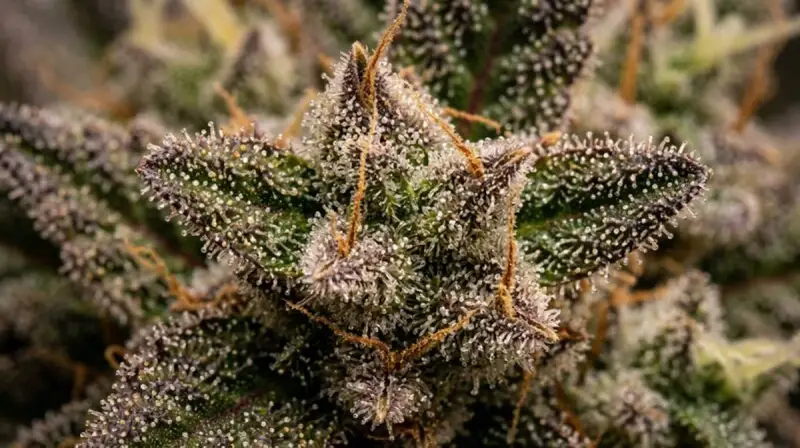
Spider Mites vs Russet Mites: Species Identification
Two mite species account for the vast majority of cannabis crop damage. Correctly identifying which pest you face is the single most important step — treating spider mites with russet mite protocols, or vice versa, wastes critical time and allows populations to explode. Both are arachnids, not insects, which means standard insecticides are ineffective against them.
Red Spider Mites vs Russet Mites: Identification Guide
Understanding the mite life cycle explains why a tiny colony becomes a catastrophic infestation within two weeks. At 80°F and 40% relative humidity — conditions common in many indoor grow rooms — T. urticae completes its entire life cycle in as little as 5 days. Females begin laying eggs 1–3 days after hatching and continue for up to 30 days, producing 3–5 eggs per day. A single mated female introduced to a grow room can theoretically produce over 1 million descendants within one month.
The life cycle proceeds through five stages: egg → larva (6 legs) → protonymph → deutonymph → adult. Each nymphal stage involves a brief resting (quiescent) phase during which the mite is not feeding but is also more resistant to contact pesticides. This is why a single treatment application never eliminates an infestation — eggs and quiescent nymphs survive and resume development 3–5 days after the spray event. Effective treatment protocols account for this biology by scheduling repeat applications timed to catch newly hatched nymphs before they reach reproductive maturity.
In cool conditions below 55°F, female spider mites enter a diapause (dormancy) state, turning orange-red and hiding in cracks, debris, and soil. This cold-hardy form can survive winter outdoors and re-emerge when temperatures rise — a critical consideration for growers in seasonal climates or those using cold storage between grows.
Early Detection: 7-Step Scouting Protocol
The difference between a manageable Level 1 infestation and crop-threatening Level 3 damage is almost always detection speed. Professional cultivators scout every 48–72 hours throughout the grow cycle, not just when symptoms appear. Here is the systematic scouting protocol used by commercial operations:
Frequency: Scout every 48 hours during veg, every 24 hours during the first 3 weeks of flower when mite populations peak.
Sticky traps: Place yellow sticky traps at canopy level and just below it. Count and log trap catches weekly; a sudden spike signals an emerging infestation before visible leaf damage appears.
Lower leaf priority: Spider mites colonize lower, older leaves first. Flip 3–5 fan leaves per plant at the lowest nodes and examine undersides with a 30× loupe.
Hot spots: Pay extra attention to corners, areas near heat sources, and any plants that have been recently introduced — these are primary infestation entry points.
Stippling check: Look at upper leaf surfaces in bright light for tiny yellow or white pinpoint dots. Early stippling resembles minor light bleaching or calcium deficiency — the loupe confirms the cause.
Webbing inspection: Check junction points between stems and petioles for fine webbing. In late-stage infestations, webbing can encase entire growing tips.
Documentation: Record findings with date, plant number, severity level (1–3), and location. Trend data allows you to catch exponential population growth before it becomes visible.
Treatment Matrix: Organic vs Conventional
Selecting the right treatment depends on growth stage, severity level, and whether you are operating an organic program. The following matrix covers all major treatment options with efficacy ratings, safety profiles, and application timing guidance. Rotate between different modes of action on every application — resistance to any single product can develop within 4–6 generations under selection pressure.
Spider Mite Treatment Matrix — Organic vs Conventional
Treatment
Type
Efficacy (Adults)
Efficacy (Eggs)
Safe Through
Mode of Action
Notes
Neem oil (azadirachtin)
Organic
High (85–90%)
Moderate (50–60%)
Week 2 flower
Disrupts molting/reproduction
Apply at night; can affect terpenes in late flower
Insecticidal soap
Organic
High (80–90%)
Low (20–30%)
Week 3 flower
Cell membrane disruption on contact
Must contact pest directly; no residual
Spinosad
OMRI organic
High (88–95%)
Low (25%)
Week 2 flower
Nicotinic acetylcholine receptor
Rotate — resistance can develop rapidly
Rosemary / clove oil
Organic
Moderate (60–70%)
Low
Any stage (diluted)
Contact irritant, terpene disruption
Safe to harvest; use as rotation filler
Phytoseiulus persimilis
Biological
Very high (sustained)
Eats eggs
Any stage
Direct predation
Best in 60–70% RH; do not combine with pesticides
Neoseiulus californicus
Biological
High (sustained)
Eats eggs
Any stage
Direct predation
More heat-tolerant than persimilis; survives low prey density
Abamectin
Conventional
Very high (>95%)
Moderate (ovicidal at high rates)
Veg only
Glutamate-gated chloride channels
MRL concerns; veg stage only; rotate with different class
Spiromesifen
Conventional
Very high (>95%)
High (ovicidal)
Veg only
Lipid biosynthesis inhibitor
Excellent egg kill; do not use in flowering
Bifenazate
Conventional
Very high (>95%)
Moderate
Veg only
Complex III electron transport inhibitor
Fast knockdown; no systemic activity
VPD Targets That Deter Spider Mites
Vapor Pressure Deficit (VPD) is the difference between the moisture the air could hold and the moisture it actually holds. Spider mites reproduce most rapidly at VPD values above 1.5 kPa — conditions that correspond to hot, dry air that stresses plants and accelerates mite biology. By managing your grow environment to maintain VPD in the ranges recommended for healthy cannabis, you simultaneously create conditions that mites find hostile.
VPD Targets for Cannabis Growth Stages vs Spider Mite Optimal Conditions
Growth Stage
Ideal VPD (kPa)
Temp (°F)
RH (%)
Mite Reproduction Rate
Prevention Rating
Seedling / Clone
0.4–0.8
72–77
65–80
Very slow
Excellent
Early Vegetative
0.8–1.0
72–79
55–70
Slow
Good
Late Vegetative
1.0–1.2
75–82
50–65
Moderate
Moderate — increase scouting
Early Flower (wk 1–3)
1.0–1.5
75–82
45–55
Fast
Poor — peak risk period
Mid Flower (wk 4–6)
1.2–1.6
75–82
40–50
Very fast
Very poor — daily scouting required
Late Flower (wk 7+)
1.5–2.0
70–78
35–45
Fastest
Critical — reduce humidity carefully
Spider Mite Optimal
>1.5
80–90
<40
Maximum
—
The practical takeaway: during flowering, you cannot maintain VPD ranges that are simultaneously optimal for both plant health and mite prevention. This is why late-flower infestations are so devastating — growers are forced to choose between bud rot risk (high humidity) and mite explosion (low humidity). The solution is aggressive preventive treatment and biological controls before flowering, not reactive treatment during it.
Prevention Protocols: Integrated Pest Management
The most effective spider mite program is one that prevents establishment rather than reacts to infestations. Integrated Pest Management (IPM) combines environmental controls, physical barriers, biological agents, and chemical tools in a systematic approach that minimizes pest populations while reducing chemical exposure to plants and growers.
Environmental Prevention
Maintain temperature below 80°F at canopy level. Keep relative humidity above 50% during vegetative growth. Ensure strong air circulation with oscillating fans so leaf surfaces stay dry and air movement disrupts mite dispersal. Clean the grow space between each cycle: remove all plant debris, wash walls with 3% hydrogen peroxide solution, and discard used growing media rather than reusing it.
Biological Prevention — Banker Plant System
Advanced cultivators establish a “banker plant” system by maintaining a separate pot of barley or wheat infested with grain mites (Tyrophagus putrescentiae) alongside their cannabis. Predatory mites introduced to the banker plant can sustain themselves on grain mites even when cannabis plant mite populations are low, maintaining an active biological control population throughout the entire grow cycle without repeated costly releases.
Physical Exclusion
Install HEPA filtration on intake air. Use sticky barriers around tent legs and grow room entrances. Quarantine all new clones for 10–14 days in a separate space before introducing them to your main garden — this step alone eliminates the majority of mite introductions in established operations.
Resistance Management
Acaricide (miticide) resistance is a serious and growing problem in cannabis cultivation. Spider mites have extremely short generation times and large population sizes — ideal conditions for rapid selection of resistance alleles. Documented resistance to abamectin, bifenazate, spiromesifen, and bifenthrin has been observed in cannabis-associated populations. To prevent resistance development in your operation:
Never apply the same product class more than twice consecutively
Rotate between products with entirely different modes of action (IRAC classification groups)
Include biological controls in every program — biological agents do not induce chemical resistance
Remove heavily infested plants entirely rather than attempting chemical rescue in late flower
Purchase miticides from reputable agricultural suppliers — counterfeit products with reduced active ingredient concentrations are common and mask resistance while actually selecting for it
Post-Harvest Room Decontamination Protocol
Spider mites in diapause or hidden in growing media, cracks, and equipment can survive a full growing cycle and re-infest your next crop immediately. This protocol eliminates overwintering populations between cycles:
Remove all plant material including roots and growing media
Vacuum all surfaces including floor, walls, and ceiling with a HEPA vacuum
Wipe all hard surfaces with 3% hydrogen peroxide solution or 70% isopropyl alcohol
Spray all cracks, corners, and equipment surfaces with a residual miticide appropriate for surfaces
Run the space at elevated temperature (95°F+) for 48–72 hours with no plants present — heat kills eggs and dormant mites
Leave fallow for a minimum of 14 days before introducing new plants
How do I tell the difference between red spider mites and russet mites on cannabis?
Red spider mites (Tetranychus urticae) are visible at 30× magnification as oval, 8-legged arachnids that produce fine silken webbing. Russet mites (Aculops cannabicola) are far smaller — requiring 60–100× magnification — have only 4 legs, and produce no webbing. Russet mites cause upward leaf curl and bronzing of lower stems, while spider mites create stippling on upper leaf surfaces. Misidentification leads to ineffective treatment choices.
Can spider mites survive after harvest and re-infest a new crop?
Yes. Spider mites survive on plant debris, growing media, equipment, and wall cracks for weeks without a live host. A thorough room decontamination between grows is essential: discard all media, wipe walls with diluted hydrogen peroxide, and leave the space fallow for at least two weeks before introducing new plants.
Is it safe to use neem oil during cannabis flowering?
Neem oil is not recommended during mid-to-late flowering as it leaves an unpleasant taste and may affect terpene profiles. If treating during early flower (weeks 1–2), use heavily diluted solutions and avoid spraying buds directly. Switch to insecticidal soap, spinosad, or predatory mites once buds begin developing. Stop all foliar treatments at least 2–3 weeks before harvest.
What VPD range deters spider mites on cannabis?
Maintaining a VPD between 0.8–1.2 kPa during vegetative growth and 1.0–1.5 kPa during early flowering keeps temperatures below 78°F and relative humidity above 55%, which significantly slows mite reproduction. Mites struggle to reproduce above 60% RH and below 70°F. Consistent VPD management is one of the most effective long-term prevention strategies.