


- Topping once creates 2 main colas; topping twice creates 4; three times creates 8 — exponential branching with each cut.
- Plants must have 5 to 7 nodes before the first topping to avoid excessive stress or stunted development.
- Topping is only performed during the vegetative stage — never after the switch to 12/12 light cycle.
- Expect 5 to 10 days of apparent slow growth after each topping as the plant redirects auxin production to lateral branches.
- Properly topped plants yield 30 to 50 percent more than single-cola plants grown in the same space and under the same light.
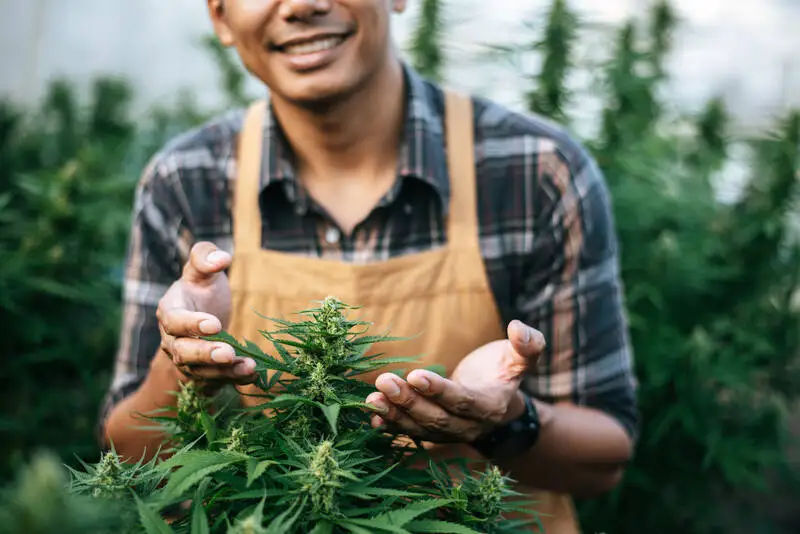
- Sterilized cutting tools are non-negotiable — dirty scissors introduce pathogens directly into fresh plant tissue.
- Topping pairs exceptionally well with LST and SCROG to create an even, light-efficient canopy across the full grow space.
What Is Topping Cannabis?
Topping is a high-stress training (HST) technique that removes the apical meristem — the dominant growing tip at the top of the main stem. In an unmodified cannabis plant, the apical tip produces auxins, hormones that suppress the growth of lateral branches and concentrate energy into a single dominant cola. By cutting this tip away, the grower eliminates apical dominance and forces the plant to redirect all of its growth energy outward and downward into the two nodes directly below the cut.
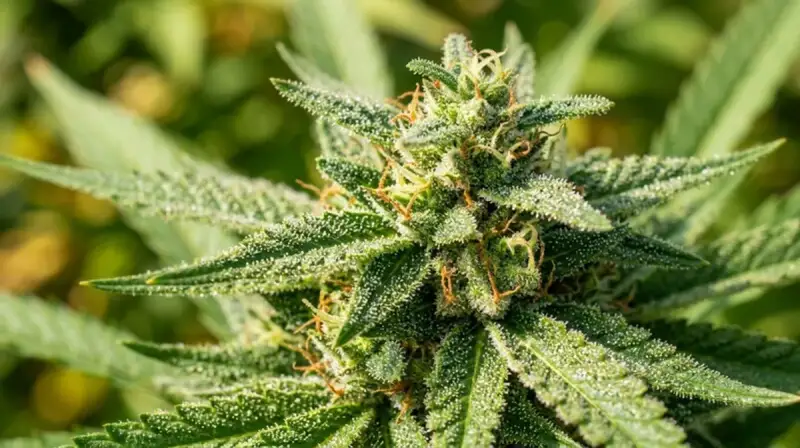
The result is a bushier, wider plant structure with multiple colas developing at approximately the same height. This dramatically increases the surface area exposed to your grow light and creates a far more efficient use of space, watts, and nutrients compared to allowing a plant to grow as a single Christmas-tree spire.
The underlying mechanism is straightforward: auxin is produced at the growing tip and travels downward, suppressing axillary buds. Remove the source of auxin and those lateral buds are released from suppression. They accelerate into new main shoots, each of which will eventually produce its own cola during flowering. Top again above each of those new shoots and you double the colas again.
When to Top: Timing Is Everything
The single most common topping mistake is cutting too early. A seedling that has only produced three or four nodes does not yet have enough root mass, leaf area, or stored energy to handle the stress of topping without suffering a significant setback. Wait until the plant has clearly established itself.
Minimum requirements before topping:
- At least 5 nodes fully developed (6 to 7 is ideal for the first topping)
- Strong, vigorous growth with tight internodal spacing
- No signs of nutrient deficiency, pH problems, or heat stress
- Roots well-established in current container (no recent transplant shock)
- Healthy, deep green fan leaves with no yellowing or spotting
Conditions that disqualify topping regardless of node count:
- Active nutrient deficiency or lockout
- Ongoing heat stress (canopy temps above 30°C)
- Root problems (overwatering, root rot, underdeveloped root zone)
- Recent transplant within the last 5 days
- Any point after the switch to flowering light schedule
In autoflowering strains, topping requires extra caution. Autos run on a fixed internal clock rather than light cycle, giving them a limited vegetative window. Some experienced growers successfully top autos once at node 4 or 5, but the margin for error is narrow. A stressed auto may never fully recover before it begins flowering, reducing rather than increasing yield.
Step-by-Step: How to Top a Cannabis Plant
- Sterilize your cutting tools. Wipe scissors or a razor blade with isopropyl alcohol (70 percent or higher) and allow to air-dry for 30 seconds. This eliminates bacteria, fungi, and viral pathogens that could infect the open wound.
- Identify the fifth node. Count up from the soil. Each pair (or alternate placement, depending on genetics) of leaves emerging from the stem is one node. The fifth node is your target reference point.
- Locate the growing tip above node 5. You will see a small cluster of new growth emerging from the very top of the main stem, just above the fifth set of leaves. This is the apical meristem.
- Make a clean, decisive cut above node 5. Cut through the main stem approximately 5 to 10mm above the fifth node. The cut should be smooth and at a slight angle to prevent water pooling on the wound. Do not saw back and forth — one clean motion reduces tissue damage.
- Inspect the cut. The two small shoots emerging from node 5 should now be the highest points on the plant. These will become your two new main colas.
- Post-cut care. Some growers apply a small amount of aloe vera gel or a commercial cloning powder to the wound as a mild sealant, though this is optional. The plant will naturally callus over within 24 to 48 hours.
- Monitor recovery. Expect a brief growth pause of 5 to 10 days. The plant may look static or even slightly stressed. This is normal. Once auxin redistribution completes, lateral growth will accelerate noticeably.
Topping vs. FIMing: Key Differences
| Factor | Topping | FIMing |
|---|---|---|
| Technique | Remove entire apical tip above chosen node | Pinch off approximately 75% of the tip |
| New colas produced | Exactly 2 | 3 to 5 (variable) |
| Stress level | Moderate (high-stress training) | Slightly lower stress |
| Recovery time | 5 to 10 days | 3 to 7 days |
| Predictability | Very high — consistent results | Variable — depends on execution |
| Difficulty | Low — beginner-friendly | Medium — requires precision pinching |
| Best use case | Structured manifold, SCROG training | Rapid multi-cola development |
Topping vs. LST vs. Manifolding
| Technique | Stress Level | Colas Created | Veg Time Added | Best For |
|---|---|---|---|---|
| Topping | High | 2, 4, or 8 | 1 to 2 weeks per cut | Beginners to intermediate growers |
| LST (Low Stress Training) | Low | Multiple lateral colas | Minimal | All skill levels, autoflowers |
| Manifolding | High | 8 symmetric colas | 3 to 5 weeks additional | Experienced growers, photoperiod strains |
Topping Schedule by Stage
| Topping Round | When to Perform | Colas After Recovery | Extra Veg Time Needed |
|---|---|---|---|
| First topping | Node 5 to 7, early veg | 2 main colas | 5 to 10 days |
| Second topping | Each new shoot at 3 to 4 nodes | 4 main colas | 7 to 12 days additional |
| Third topping | Each of the 4 shoots at 3 nodes | 8 main colas | 7 to 14 days additional |
Yield Improvement from Topping
The yield benefit of topping is not marginal — it is structural. A single-cola plant concentrates most of its floral energy into one dominant bud site at the apex, with smaller, often airy side buds forming on lower branches that receive less light. The harvest is top-heavy and inefficient relative to the total canopy space occupied.
A properly topped plant with 4 or 8 colas of roughly equal height spreads that same floral energy across multiple sites, all receiving similar light intensity. This is why studies and experienced growers consistently observe 30 to 50 percent higher yields from topped plants versus untopped plants under the same grow light and in the same volume of growing medium.
The ceiling for yield improvement rises further when topping is combined with SCROG or LST. In those setups, topping provides the multiple cola architecture while the training technique ensures every cola sits at the same distance from the light source, maximizing photon delivery across the entire canopy.
Best Strains for Topping
| Strain | Response to Topping | Recovery Speed | Notes |
|---|---|---|---|
| Blue Dream | Excellent | Fast | Sativa-dominant vigour; responds aggressively with multiple shoots |
| OG Kush | Very good | Moderate | Compact internodes after topping; dense cola structure |
| White Widow | Excellent | Fast | Beginner-friendly strain that handles topping without fuss |
| Gorilla Glue #4 | Outstanding | Fast | High-vigour genetics; branches fill out rapidly after each cut |
| Northern Lights | Good | Moderate | Classic indica structure; stays compact after topping |
| Gelato | Good | Moderate | Slightly fussier; ensure plants are healthy before topping |
Common Topping Mistakes to Avoid
- Topping too early: Cutting before node 5 stresses a plant that lacks the root mass and stored energy to recover quickly. The result is stunted growth that negates any yield benefit.
- Topping into the flowering stage: Once a cannabis plant has been switched to a 12/12 light cycle, it will not develop new vegetative growth from a topping cut. You will simply wound the plant and potentially introduce disease with no canopy benefit.
- Using dirty or dull tools: Scissors that have not been sterilized introduce bacteria and fungal spores directly into fresh plant tissue. Dull blades crush and tear the stem rather than cutting cleanly, increasing healing time and infection risk.
- Cutting the wrong node: Removing growth too far below the tip wastes viable shoot material. Cutting too close to the tip may not fully remove the apical meristem, resulting in regrowth rather than branching.
- Neglecting post-topping nutrition: The plant’s energy demand spikes during recovery as it builds two new primary shoots. Undersupplying nitrogen and phosphorus during this phase slows recovery measurably.
- Topping autoflowering strains without experience: Autos have a hard vegetative window. Beginners are better served by LST on autoflowering plants until they understand recovery timelines.
Post-Topping Care
The days immediately after topping are critical. The plant redirects its hormonal signalling system and the grower’s job is to reduce any additional stressors that might compete with that recovery process.
Nutrition: Maintain or slightly increase nitrogen availability in the days after topping. The plant is building new shoot tissue rapidly and the demand for vegetative macronutrients is elevated. Avoid flushing or switching to bloom nutrients until the canopy has clearly recovered and new growth is vigorous.
Watering: Do not overwater during recovery. A plant under mild stress from topping is more susceptible to root-zone problems. Allow the medium to partially dry between waterings and ensure adequate drainage.
Light: If growing under intense LEDs or HPS, consider raising the light slightly for 3 to 5 days after topping to reduce photon stress on freshly cut plants. This is a minor adjustment but can speed visible recovery.
Temperature and humidity: Maintain optimal vegetative conditions: 22 to 26°C canopy temperature and 55 to 65 percent relative humidity. Avoid opening the grow space unnecessarily in the 48 hours after cutting.
Frequently Asked Questions
When should I top my cannabis plant?
Top your cannabis plant during the vegetative stage once it has developed at least 5 to 7 nodes. The plant should look healthy, with strong internodal spacing and no signs of nutrient deficiency or environmental stress. Topping a weak or recently stressed plant will compound problems rather than solve them.
How many times can you top cannabis?
You can top cannabis plants 2 to 3 times per vegetative cycle. Each topping roughly doubles the number of main colas: one top creates 2, two tops create 4, three tops create 8. Each additional topping requires more recovery time and a longer vegetative period. Most home growers top twice and then transition to SCROG or LST to manage the resulting canopy.
Does topping increase yield?
Yes. Topping can increase yield by 30 to 50 percent compared to a single-cola plant grown in the same space, provided the plant has sufficient light coverage, nutrition, and recovery time before the switch to flowering. The gain comes from distributing floral energy across multiple equally-lit cola sites rather than concentrating it in one dominant apex.
What is the difference between topping and FIMing?
Topping removes the entire apical tip above a chosen node, producing exactly two new main shoots with high predictability. FIMing pinches off roughly 75 percent of the growing tip, often producing three to five new shoots but with more variable results. FIMing has a slightly faster recovery time; topping is more reliable and better suited to structured training systems like manifolding or SCROG.
Understanding Auxin Redistribution After Topping
To fully grasp why topping works, it helps to understand the hormonal biology underlying the technique. Cannabis, like all vascular plants, relies on a class of plant hormones called auxins — primarily indole-3-acetic acid (IAA) — to regulate growth direction and intensity. The apical meristem is the primary site of auxin synthesis. Auxin produced here travels downward through the phloem, suppressing the development of axillary buds along the stem through a process called apical dominance.
When you remove the apical meristem by topping, you eliminate the auxin source. The two axillary buds immediately below the cut are no longer suppressed. Cytokinin hormones — which promote lateral bud development and compete with auxin — now dominate at these sites, triggering rapid growth into new primary shoots. The more auxin-dominated the plant was before topping (i.e., the more pronounced the single central stem), the more dramatic this hormonal release and lateral growth response will typically be.
This is also why recovery time varies between plants: a highly vigorous plant with an active root zone and abundant stored carbohydrates reassigns energy to the new shoots quickly. A stressed or nutritionally deficient plant must first stabilise its internal chemistry before it can redirect growth resources effectively.
Topping in Outdoor and Greenhouse Grows
Topping is not exclusive to indoor cultivation. Outdoor and greenhouse growers use the same technique to manage plant height and maximise exposure to natural sunlight across a wider canopy. In outdoor environments, the principles are identical but the timing considerations shift.
Outdoor plants are typically topped in the early part of the outdoor growing season when the plant has established 5 to 7 nodes and temperatures are stable. Because outdoor plants often grow significantly larger than indoor-grown specimens, multiple toppings are common practice — particularly for full-season photoperiod strains that may run 6 to 8 months from seed to harvest in favourable climates.
Greenhouse growers benefit from the combination of natural light and environmental control that indoor growing provides. Topping schedules in greenhouses can be planned precisely because the grower controls light schedule, making the switch to flowering a deliberate decision rather than a seasonal one.
In all cases, the outdoor and greenhouse application of topping follows the same non-negotiable rule: only during the vegetative phase, only on healthy plants, only with sterilized tools.
Nutrient Adjustments Around Topping
The nutritional demands of a cannabis plant shift during the recovery period following each topping. Understanding these shifts helps the grower avoid both deficiency and excess during a sensitive growth phase.
In the immediate 48 hours after topping, the plant prioritises wound response over growth. Enzymatic activity at the cut site increases and the plant draws on its stored reserves of carbohydrates and micronutrients. Heavy feeding during this window is counterproductive — the plant is not actively growing and cannot process high nutrient concentrations efficiently. Maintain current feeding levels and ensure pH is optimal for nutrient uptake.
From day 3 onward, as the new lateral shoots begin rapid growth, nitrogen demand increases noticeably. The plant is building substantial new vegetative tissue — two primary shoots, each of which will eventually produce their own leaves, nodes, and branches. A moderate increase in vegetative-formula nutrients (higher N, moderate P and K) supports this accelerated growth phase without risking nutrient burn on the sensitive new growth tips.
When Not to Top: Warning Signs to Watch For
Knowing when to hold off on topping is as important as knowing the technique itself. Growers who top at the wrong moment waste the potential of an otherwise healthy plant by compounding existing problems with unnecessary stress.
Watch for these conditions before topping:
- Leaf curl or clawing indicating nitrogen toxicity or overwatering
- Pale yellowing of newer growth, which may indicate iron deficiency or pH lockout
- Interveinal chlorosis (yellow between leaf veins, green veins) suggesting magnesium or iron deficiency
- Slow, sparse new growth indicating root zone problems or low temperatures
- Any visible pest damage — spider mites, fungus gnats, thrips — that is actively damaging leaf tissue
- Drooping or wilted leaves that have not recovered within the normal wet/dry watering cycle
In all these cases, identify and resolve the underlying issue before topping. A plant under physiological stress channels its limited resources into survival rather than rapid lateral growth, making post-topping recovery slow, incomplete, or potentially damaging to the overall grow outcome.
Topping and the Manifolding Technique
Manifolding (sometimes called main-lining) is an advanced training technique that uses topping as its primary tool to create a perfectly symmetrical plant structure with 8 equal-sized primary colas. While it requires more vegetative time than standard topping, the result is one of the most uniformly productive canopy structures achievable in home cultivation.
The manifolding process begins with a single topping at node 3 (lower than the standard node 5 recommendation for regular topping). All growth below node 3 is removed, leaving only the two new shoots emerging from node 3. These two shoots are then trained horizontally with LST to create a symmetrical Y-shaped base. Once each of these shoots develops 3 nodes, they are topped again above node 3, producing 4 shoots. A third topping of all 4 shoots creates 8, which are then allowed to grow vertically into 8 equal-sized colas.
The yield advantage of manifolding over standard multi-topping is consistency: because all 8 colas share the same root system with equal nutrient access and grow from the same base height, they produce buds of remarkably similar size and quality, simplifying harvest and processing considerably.
Summary: Key Topping Principles
Topping is a reliable, well-understood technique that consistently delivers 30 to 50 percent yield improvements over single-cola plants when executed correctly. The non-negotiable elements are: waiting for a minimum of 5 nodes, operating only during the vegetative phase, using sterilized tools, and giving the plant adequate recovery time with appropriate nutrition before initiating further stress. Combined with LST, SCROG, or manifolding, topping forms the foundation of virtually every high-performance indoor cultivation method available to home growers today.
The learning curve is short. Most growers who top correctly even once develop an intuitive feel for the technique that makes subsequent toppings routine rather than stressful. Start with a vigorous, forgiving strain like White Widow or Gorilla Glue on your first topped grow and observe the lateral growth response closely. The visual feedback from a recovering topped plant — two new shoots accelerating outward in the days after the cut — is one of the most satisfying sights in home cultivation and one of the clearest demonstrations of plant hormonal biology in action.
Every skilled cultivator has a first topped plant in their grow history. The technique is simple enough to execute successfully on the first attempt, and forgiving enough that minor errors in timing or cut placement rarely cause permanent damage to a healthy plant. Start with a strong, indica-dominant hybrid, top at node 5 to 7, and allow the plant to demonstrate what it is capable of when apical dominance is removed. The results are some of the most visible and rewarding in all of home cultivation.
Combining topping with low-stress training in subsequent weeks is the most direct path from beginner to consistently high-yield home grows. The investment is minimal: a pair of sterilized scissors and a few ties. The return, measured in denser, heavier harvests from the same space and same light, is one of the highest available per unit of effort in cannabis cultivation.