


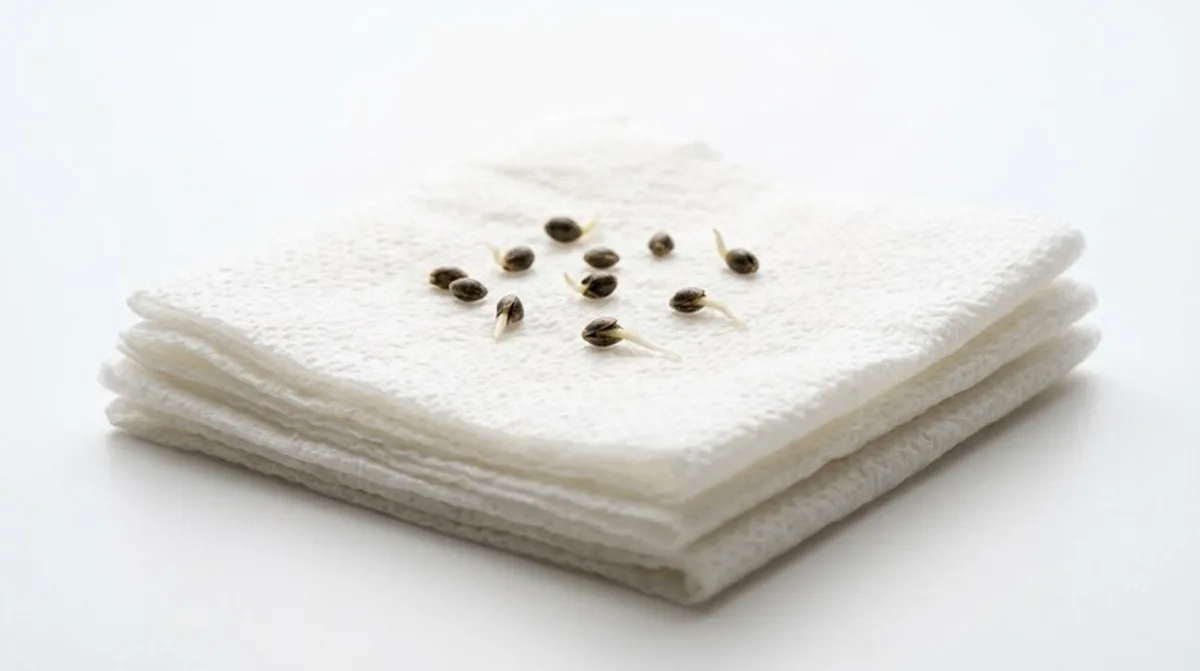
- The paper towel method achieves 85–95% germination success when temperature is held at 70–85°F (21–29°C) and moisture is maintained without saturation.
- Most viable cannabis seeds produce a visible taproot within 24–72 hours at optimal temperature; seeds that fail to sprout after 5–7 days likely have low viability.
- Seed viability declines significantly after 2–3 years without cold, dark, airtight storage — ideal long-term storage is 40°F (4°C) in a sealed, opaque container.
- Overwatering during germination and early seedling stage is responsible for an estimated 40% of beginner failures — the medium should be moist, never wet.
- Transplant when the taproot reaches 0.5–1 cm — longer taproots are fragile and prone to breakage that kills the seedling before it establishes.
- Feminized seeds from reputable breeders achieve germination rates comparable to regular seeds — 90%+ — when environmental conditions are correctly maintained.
- Autoflowering seeds are germinated identically to photoperiod seeds but require no light schedule change to trigger flowering — they flower automatically by age regardless of light cycle.
Seed Viability: How to Identify Germinable Seeds
Every successful grow starts with a viable seed. Understanding how to identify and select quality seeds before germination saves time, growing medium, and the frustration of nursing a seedling from a low-viability seed that never reaches its genetic potential. The physical characteristics of a healthy, viable cannabis seed are consistent regardless of strain or breeder and can be evaluated in seconds without any equipment.
Indicators of high viability: A viable seed is hard — it should not crack or flex under firm thumb pressure. It is dark in colour, ranging from medium grey to dark brown or black, and often displays a distinctive tiger-stripe or marbled pattern on the shell. The surface may have a subtle waxy sheen. Size varies by strain, but within a batch from a reputable breeder, the larger seeds in the group typically germinate more vigorously.
Indicators of low viability: Pale green, white, or very light tan seeds have not fully matured and rarely germinate. Seeds that crack or flatten under gentle pressure have damaged embryos. Very small seeds within a batch are often underdeveloped. Seeds that feel hollow or rattle when shaken are non-viable.
The float test provides a secondary viability check: place seeds in a glass of room-temperature water for 1–2 hours. Seeds that sink are denser and more likely to be viable. Seeds that float may still germinate — this test is not definitive — but floating seeds have a higher failure rate on average. Do not leave seeds in water for more than 24 hours, as extended submersion can cause oxygen deprivation and damage the embryo. If using the float test, proceed immediately to germination rather than drying and re-storing. For information on selecting the best cannabis strains from seed, our strain library includes genetic background and seed availability data for hundreds of varieties.
Germination Methods Compared
| Method | Success Rate | Time to Taproot | Difficulty | Best For |
|---|---|---|---|---|
| Paper towel (moist) | 85–95% | 24–72 hrs | Beginner | All seed types, full visibility |
| Water glass soak (24 hrs) | 80–90% | 24–48 hrs to paper towel | Beginner | Hard-shelled older seeds |
| Direct soil/coco | 75–85% | 2–5 days | Beginner | No transplant shock risk |
| Rapid Rooter plugs | 88–95% | 2–4 days | Beginner | Hydroponic starts, clones |
| Rockwool starter cubes | 85–92% | 2–5 days | Intermediate | Hydro grows, requires pH adjustment |
| Peat pellets (Jiffy) | 82–90% | 2–4 days | Beginner | Soil transplant, biodegradable |
The paper towel method is the most widely used because it provides direct visibility of the germination process — the grower can see the taproot emerge and measure its length precisely before transplanting. This eliminates the guesswork inherent in direct-soil germination, where there is no way to know if the seed has sprouted until the seedling breaks the surface several days later.
Paper Towel Method: Step-by-Step
The paper towel germination method is the preferred starting point for most home growers because it is simple, inexpensive, and gives the grower direct control over the environment without requiring any specialised equipment. The only materials needed are two sheets of plain paper towel (avoid printed or dyed varieties — inks can harm seeds), a dinner plate or shallow container, a warm dark location, and a spray bottle of plain water pH-adjusted to 6.0–6.5.
- Dampen the towels: Wet both paper towels thoroughly, then wring out excess water until they are moist but not dripping. Overly wet towels create anaerobic conditions that prevent oxygen from reaching the seed and dramatically increase the risk of seed rot.
- Place seeds: Lay seeds on one damp towel, spaced at least 2–3 cm apart. Fold the second towel over the top to cover them completely.
- Create a dark, warm environment: Fold the towel-and-seed package onto a plate, cover with another plate or place inside a dark plastic bag, and position on a heat source that maintains 70–85°F. A seed mat, the top of a warm appliance, or inside a cabinet above a light source are common options.
- Check every 12–24 hours: Open carefully and inspect each seed. Do not tug on seeds that are beginning to crack — wait for the taproot to emerge naturally.
- Transplant at 0.5–1 cm taproot length: Once the white taproot is visible and measures half to one centimetre, the seed is ready to plant. Handle exclusively by the seed shell — touching the taproot even briefly can break the fragile tip and kill the seedling.
- Plant root-down: Create a small hole approximately 5–10 mm deep in your moist growing medium. Drop the seed in root-first, cover lightly, and mist the surface. Do not pack or compress the medium over the seed.
Temperature consistency is the most critical variable in the paper towel method. Fluctuations between warm and cool delay germination and can cause stress responses that weaken the early seedling. If room temperature is below 70°F, a seedling heat mat set to 77°F provides the ideal stable environment. Most seeds from quality breeders will produce a taproot within 24–48 hours at consistent optimal temperature.
Seedling Stage Care: The First Two Weeks
The seedling stage — from the emergence of the first pair of true leaves (cotyledons) through the development of the third node — is the most fragile period of the cannabis life cycle. A seedling has a minimal root system, undeveloped vascular tissue, and limited capacity to process nutrients. Almost every seedling problem in home growing results from giving the plant too much: too much water, too much light intensity, too much nutrients, or too much heat.
Light: An 18/6 schedule (18 hours on, 6 hours off) is standard for all seedlings regardless of whether they are photoperiod or autoflowering. Intensity should be low — seedlings can easily bleach or light-stress under powerful LEDs at close range. Keep high-intensity LEDs at 60–90 cm distance during the seedling stage and adjust downward gradually as the plant develops.
Watering: Water lightly and only when the top 1–2 cm of growing medium is dry. A seedling in a large pot will use very little water in its first week — the root ball is tiny and most of the medium is not yet explored by roots. Watering the entire pot surface creates saturated zones that suffocate the root zone with poor oxygen availability. Water in a small circle around the stem only, encouraging roots to grow outward in search of moisture.
Humidity dome: A clear plastic dome or humidity tent over seedlings for the first 3–5 days maintains 70–80% relative humidity at the leaf surface, which reduces water loss through the stomata while the root system is not yet capable of replacing it. Remove the dome gradually — lift one corner for increasing periods each day rather than removing it all at once.
Nutrients: Do not add any nutrients to seedlings for the first 1–2 weeks. A quality seedling mix or starting plug contains all the nutrients a germinated seed needs for its first two weeks of above-soil growth. Nutrient burn in seedlings is common and severely sets back early development. If growing in plain coco or rockwool, begin with a quarter-strength seedling formula only after the first set of true leaves has fully developed.
Germination Troubleshooting
| Problem | Cause | Fix |
|---|---|---|
| Seed not sprouting after 5 days | Low viability, temperature too low, or dry paper towel | Check temperature (target 77°F); re-dampen towel; scarify shell lightly if old seed |
| Taproot brown or slimy | Over-wet towel, anaerobic conditions, pathogen contact | Replace with fresh damp (not wet) towel; discard obviously infected seeds |
| Damping off (seedling collapses at soil level) | Overwatering, poor drainage, fungal pathogen (Pythium/Fusarium) | Reduce watering frequency; improve drainage; add beneficial microbes (Trichoderma) |
| Seedling stretching (long, thin stem) | Insufficient light intensity or light too far away | Lower light source; increase intensity; add reflective walls |
| Slow growth after sprouting | Cold medium, low light, over-watering, or pH imbalance | Check medium temperature (min 65°F); verify pH 6.0–6.5; reduce watering frequency |
| Cotyledons yellowing at day 5–7 | Normal senescence OR nutrient deficiency in depleted medium | Check growing medium — if using inert coco/rockwool, begin quarter-strength seedling nutrients |
| Seed shell stuck on seedling head | Planted too shallow; humidity too low | Mist gently to soften shell; use clean tweezers carefully; never force removal |
Feminized, Regular, and Autoflower: Germination Differences
Cannabis seeds are sold in three main categories — regular, feminized, and autoflowering — and the germination process is essentially identical for all three. The differences between them become relevant only after the seedling establishes, in terms of how the resulting plant responds to light schedule changes and how long it spends in the vegetative stage.
Regular seeds are natural, unmodified seeds that produce approximately 50% male and 50% female plants. Germination success rates are typically 85–90% from quality breeders. Male plants identified during early veg are removed before they pollinate females.
Feminized seeds are bred to produce only female plants (99%+ in quality genetics). They are the most popular choice for home growers because every seed that germinates and establishes can be grown to harvest without the need to identify and remove males. Germination success rates from reputable breeders are comparable to regular seeds at 90%+.
Autoflowering seeds — both regular-auto and feminized-auto varieties — germinate identically to photoperiod seeds. The difference is entirely in their post-germination development: autoflowers begin the transition to flowering based on age (typically 3–5 weeks) regardless of the light schedule they receive. This means germination timing, early seedling care, and the critical first two weeks of development have an outsized effect on final yield, since there is no vegetative period extension available to compensate for a slow start. A healthy, stress-free seedling that hits the ground running translates directly into a larger autoflower plant at harvest.
For growers who plan to move from germination directly into a hydroponic system, Rapid Rooter plugs and rockwool cubes are the preferred germination medium because they transplant cleanly into hydro systems without disrupting roots or introducing soil-borne pathogens into the reservoir. Soil growers transition most easily from peat pellets or direct-to-final-container soil germination.