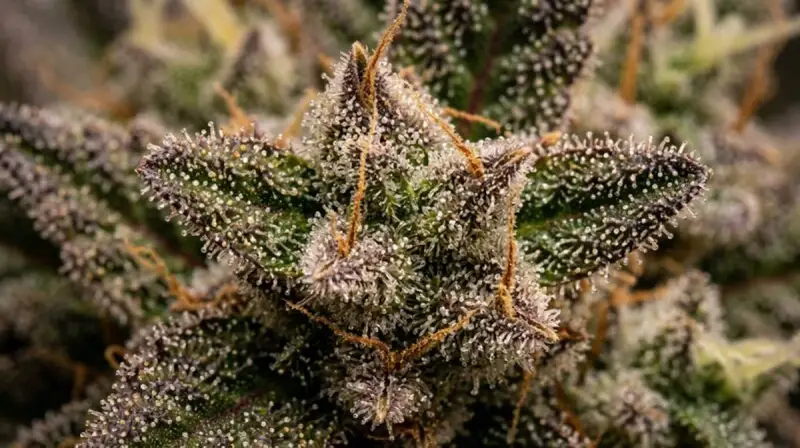


By Jordan Price · Growing Guide · Updated May 2026
- Overwatering is the single most common killer: More cannabis plants are lost to overwatering than to any other single factor. Waterlogged medium deprives roots of oxygen — the mechanism is suffocation, not drowning — which is a critical distinction for diagnosis and fix.
- The lift test beats any schedule: Lift the pot immediately after watering and note the weight. Water again when the pot feels 30–50% lighter and the top inch of soil is dry. No timer or calendar schedule is as accurate as your own hands.
- pH controls nutrient availability: Incorrect pH locks out nutrients regardless of how much you feed. Every symptom including yellowing, spots, and curling can be caused by pH error rather than actual nutrient deficiency — check pH before adding nutrients.
- Wet/dry cycling delivers oxygen: As medium dries between waterings, air floods back into pore spaces. This oxygen delivery is as essential to root health as the water and nutrients. Eliminating the dry phase eliminates the oxygen cycle.
- 10–20% runoff prevents salt buildup: Running water beyond field capacity pushes accumulated mineral salts out of the root zone, preventing EC spikes that cause nutrient toxicity and lockout symptoms.
- Water temperature directly affects root health: Cold water below 60°F temporarily slows nutrient uptake and stresses root cells. Water above 80°F has dangerously low dissolved oxygen and creates conditions for Pythium root rot. Target 68–72°F.
- There is no universal schedule: Frequency ranges from twice daily in coco to once every 4 days in large soil containers. The correct schedule is the one your specific plant, pot, medium, and environment require. Learn to read the indicators — not the clock.
Why Watering Technique Determines Plant Health
Cannabis roots need two things simultaneously: water (carrying dissolved nutrients) and oxygen. These needs are in direct tension — a saturated medium delivers water but eliminates oxygen, while an overly dry medium delivers oxygen but no water. Mastering the wet/dry cycle means understanding that watering thoroughly and then allowing proper dry-down is not neglect — it is precision root zone management.
Root cells are aerobic organisms: they require oxygen for the ATP-producing cellular respiration that powers active nutrient transport. Root cells use energy-dependent pumps (H+/K+ ATPases, calcium channels) to pull mineral ions against concentration gradients from the soil solution into root tissue. Without oxygen, these pumps cannot function at full capacity. When medium is continuously saturated, dissolved oxygen depletes within hours. Root cells shift to anaerobic pathways that produce toxic byproducts including ethanol and acetaldehyde. Root death follows, and opportunistic pathogens — Pythium, Fusarium, Phytophthora — colonize the dying tissue.
The wet/dry cycle ensures that after each thorough watering, as the medium dries from 100% field capacity to approximately 40–60% moisture, air progressively fills the pore spaces vacated by water. This creates the oxygen delivery mechanism that keeps root cells in aerobic respiration mode. For growers using coco coir or hydroponic systems where the dynamics differ, see the coco growing guide. For understanding how transpiration demand drives watering frequency, see the VPD guide.
The Lift Test: Your Most Reliable Tool
The lift test is the single most reliable method for determining when to water, regardless of medium type, plant size, or environmental conditions. The method:
- After watering: Lift the pot immediately after a full watering. Note the weight in your mind or on paper. This is your “full” baseline.
- Let it dry: Place the pot back and allow normal growing conditions.
- Test daily: Lift the pot each day. When it feels noticeably lighter — roughly 30–50% lighter than the full baseline — and the top 2–3 cm of soil feels dry to the touch, it is time to water again.
- Calibrate over time: Within a few grow cycles, you will recognize the “water now” weight instinctively without consciously testing it.
The finger test supplements the lift test: push your finger 2–3 cm deep into the substrate near the edge of the pot. If it feels moist at that depth, wait. If it feels dry, water. The finger test is more useful for large containers where the weight difference between full and dry is harder to judge.
Watering Volume by Container Size and Growth Stage
| Container Size | Seedling (50–150ml) | Early Veg | Peak Veg | Early Flower | Peak Flower |
|---|---|---|---|---|---|
| 1 gallon (3.8L) | 50–75ml | 150–300ml | 400–600ml | 600–800ml | 700–900ml |
| 2 gallon (7.6L) | 75–150ml | 300–500ml | 600–900ml | 800ml–1.2L | 1.0–1.5L |
| 3 gallon (11.4L) | 100–200ml | 400–700ml | 800ml–1.2L | 1.2–1.8L | 1.5–2.5L |
| 5 gallon (19L) | 150–300ml | 600ml–1.0L | 1.2–2.0L | 2.0–3.0L | 2.5–4.0L |
| 7 gallon (26.5L) | 200–400ml | 800ml–1.5L | 2.0–3.0L | 3.0–4.5L | 3.5–5.5L |
| 10 gallon (38L) | 300–500ml | 1.2–2.0L | 3.0–4.5L | 4.5–6.0L | 5.0–8.0L |
Volumes are guidelines only. Always water until 10–20% runoff at the drainage holes. Adjust based on lift test results and environmental conditions. Higher temperatures and lower humidity increase transpiration demand and therefore watering frequency and volume.
Watering Frequency by Growth Stage
| Stage | Root Zone Size | Typical Frequency (Soil) | Key Indicators | Notes |
|---|---|---|---|---|
| Seedling | Very small; cotyledon stage | Every 2–4 days; small volumes only | Surface dry; pot feels same weight as when watered (tiny volume) | 50–100ml maximum; target area immediately around stem only; no runoff needed at this stage |
| Early Veg | Growing; 2–4 true nodes | Every 2–3 days | Lift test: 30% lighter; top cm dry | Begin expanding watering radius as root zone grows; introduce runoff watering |
| Peak Veg | Established; filling pot | Every 1–3 days | Lift test: noticeably lighter; finger test dry at 2cm | Full pot volume waterings; aim for 10–20% runoff every time |
| Early Flower (weeks 1–3) | Established; expanding | Every 1–2 days | Plant transpiring more; pot dries faster | Increased nutrient demand; check runoff EC to monitor salt buildup |
| Peak Flower (weeks 4–7) | Fully developed | Every 1–2 days; sometimes daily | Large plant transpiring at maximum rate; may need daily watering in hot conditions | Highest nutrient demand stage; watch for tip burn from excess N; keep runoff EC in range |
| Late Flower / Pre-Harvest | Mature | Every 1–3 days; reduce volume slightly | Plant demand decreasing as leaves yellow naturally | Flush debate applies here; if flushing, switch to plain pH’d water 1–2 weeks before harvest |
pH Targets by Medium
| Medium | Optimal pH Range | Acceptable Range | Problem Below | Problem Above |
|---|---|---|---|---|
| Soil / Loam | 6.3–6.8 | 6.0–7.0 | <6.0: Fe, Mn excess; P lockout | >7.0: Fe, Mn, Zn lockout |
| Coco Coir | 5.8–6.0 | 5.5–6.1 | <5.5: Ca, Mg, Fe uptake issues | >6.2: Ca, Mg lockout rapidly |
| Hydroponics / DWC | 5.7–6.0 | 5.5–6.2 | <5.5: Ca/K competition; Fe excess | >6.2: P, Fe, Mn lockout |
| Rockwool | 5.7–6.0 | 5.5–6.2 | Same as hydro | Same as hydro |
| Organic Living Soil | 6.5–7.0 | 6.2–7.2 | <6.2: disrupts microbial activity; enzyme efficiency drops | >7.2: broad micronutrient lockout |
| Perlite-heavy mix (>50%) | 5.8–6.5 | 5.5–6.8 | <5.5: same as coco | >7.0: same as soil |
Overwatering vs. Underwatering: Complete Diagnosis Guide
Both overwatering and underwatering cause cannabis plants to droop. The distinction is in the leaves’ physical state and additional indicators. Getting this diagnosis right is critical because the treatment is opposite: more water for underwatering, less water (and sometimes improved drainage) for overwatering.
| Symptom | Overwatering | Underwatering | How to Test |
|---|---|---|---|
| Leaf posture | Drooping downward; curled down; “praying” posture gone | Drooping, wilting; leaves pointing up and inward; limp | Feel the leaf: firm and full = overwater; limp and thin = underwater |
| Leaf texture | Firm, plump, thick; cells fully turgid | Soft, limp, paper-thin; cells depleted of turgor pressure | Gently pinch a leaf; firmness indicates over; limpness indicates under |
| Leaf color | Yellowing starting at lower leaves; pale; possible rusty spots | Pale, dull green; tips may crisp; overall loss of vibrancy | Check which leaves are affected and pattern of discoloration |
| Soil / medium condition | Wet, heavy, staying wet for 4+ days; may smell sour or musty | Very dry; light; may be pulling away from pot edges; hydrophobic | Lift test; push finger 2cm in; smell the substrate |
| Root appearance (if visible) | Brown, slimy; anaerobic odor; root rot (Pythium) | White, healthy; dry medium; no visible pathogen signs | Check drainage holes or lift plant from pot to inspect root ball |
| Recovery speed | Slow: 1–5 days; stop watering; improve drainage | Fast: 30–60 minutes after thorough watering | Water the plant and observe over 1 hour; rapid perking up = underwatering was the cause |
| Fungus gnats | Often present (larvae thrive in wet soil) | Absent | Look for small flies at substrate surface; yellow sticky traps reveal presence |
Watering Frequency by Medium
| Medium | Typical Frequency | Runoff Target | pH Target | Key Note |
|---|---|---|---|---|
| Potting Soil (3–5 gal) | Every 2–4 days | 10–20% | 6.0–7.0 | Lift test is the best guide; no fixed schedule |
| Coco Coir | Daily; 2–4×/day in late flower | 10–20% | 5.5–6.1 | Never let coco fully dry out; it becomes hydrophobic |
| DWC / Deep Water Culture | Continuous (roots submerged) | N/A | 5.5–6.0 | Air stones maintain dissolved oxygen; reservoir temp critical (<72°F) |
| Rockwool (flood & drain) | 4–8 flood cycles per day | 20%+ | 5.5–6.0 | Flood timing tied to lights-on cycle; drain fully between floods |
| Outdoor Soil / Garden Bed | Every 3–7 days (weather-dependent) | Natural drainage | 6.2–7.0 | Rain counts toward schedule; adjust for local humidity and temperature |
| Perlite-Heavy Mix (50%+) | Daily or every other day | 20–30% | 5.8–6.5 | Faster drainage = more frequent watering; treat closer to coco than soil |
Water Quality: pH, EC, Temperature, and Chlorine
Water quality directly affects nutrient availability, root health, and microbial life in the root zone. The four parameters to check and adjust before every watering are pH, EC, temperature, and chlorine content.
| Parameter | Optimal | Acceptable | Problem Range | Fix |
|---|---|---|---|---|
| pH | 6.3–6.8 (soil) / 5.8–6.0 (coco) | ±0.3 from optimal | <5.0 or >7.8 | pH Up (potassium hydroxide) or pH Down (phosphoric acid) |
| EC (input water before nutrients) | <0.3 mS/cm (near-pure) | 0.3–0.6 mS/cm | >0.8 mS/cm (mineral-heavy tap water) | RO filter; blend with RO water; use distilled |
| Temperature | 68–72°F (20–22°C) | 60–75°F | <55°F or >80°F | Aquarium heater; store water at room temp 24 hours before use |
| Chlorine (ppm) | 0 ppm | <0.5 ppm | >1.0 ppm | Let tap water sit uncovered 24 hours; use 1 campden tablet per 20 gallons; UV filter |
| Chloramine (ppm) | 0 ppm | <0.3 ppm | >0.5 ppm | Does not off-gas like chlorine; requires campden tablets, activated carbon, or RO filtration |
| Dissolved Oxygen (DWC) | >7 mg/L | 5–7 mg/L | <4 mg/L | Air stones; cool reservoir temperature; hydrogen peroxide (1ml/gal 3% H2O2) |
RO Water vs. Tap Water
Reverse osmosis (RO) water is the preferred starting point for cannabis cultivation because it removes virtually all dissolved minerals, starting you from a near-zero baseline EC. This allows precise control over nutrient ratios — you are only feeding what you intentionally add. The downside: RO water is deficient in calcium and magnesium, which must be supplemented with Cal-Mag products at 1–2 ml/L before pH adjustment and nutrient addition.
Tap water is acceptable if the source EC is below 0.6 mS/cm and pH is in an adjustable range. High-mineral tap water (EC > 0.8) leaves less room for nutrient additions before hitting toxic EC levels and can introduce calcium carbonate (hardness) that drives pH up over time. Check your local water utility’s annual water quality report for baseline mineral content. If your tap water is soft and low-EC, it can work almost as well as RO water.
Chlorine vs. chloramine: Most municipal water uses chlorine or chloramine to prevent bacterial growth. Chlorine off-gasses if you leave water uncovered for 24 hours. Chloramine does not off-gas and requires chemical treatment (campden tablets containing potassium metabisulfite) or filtration. Check your local utility to know which disinfectant they use.
The Pre-Harvest Flush: Evidence and Arguments
Pre-harvest flushing remains one of the most debated topics in cannabis cultivation. The traditional argument is that feeding plain water for 1–2 weeks before harvest forces the plant to consume stored mineral reserves, resulting in smoother-tasting, less chemically-flavored smoke.
The most cited scientific challenge to this practice comes from a 2019 Humboldt State University study (Conley et al.) that found flushing did not significantly improve subjective flavor or smoothness scores in blind taste tests of organically grown cannabis. The authors argued that nutrient reserves in plant tissue are relatively fixed and that brief flushing periods do not meaningfully alter final mineral content.
Arguments for flushing: Reduces accumulated mineral salts in coco and hydroponic systems; may improve flavor in heavily synthetically-fed grows; simple to implement; minimal downside if done correctly.
Arguments against flushing: In organic living soil, flushing disrupts the microbial ecosystem that drives nutrient cycling; starving the plant in the final weeks may reduce terpene and cannabinoid production that requires metabolic energy; the Humboldt study found no measurable benefit.
The practical consensus among experienced cultivators: if using a heavily salt-based synthetic nutrient line in coco or hydro, a 1-week flush is unlikely to hurt and may help. In organic living soil or lightly-fed synthetic soil grows, flushing is at best neutral and at worst counterproductive.
Autoflower Watering Considerations
Autoflowering cannabis strains generally use the same watering principles as photoperiod plants, with a few practical differences driven by their compact size and shorter life cycle.
- Smaller containers = more frequent watering: Most autoflowers are grown in 2–5 gallon containers. Smaller volumes dry faster, meaning frequency is higher even though individual volumes are smaller.
- Life cycle speed affects EC management: With a total grow time of 8–12 weeks, any salt buildup in the root zone has less time to be corrected before harvest. Maintain closer attention to runoff EC to catch accumulation early.
- Seedling phase is proportionally longer relative to total life: The first 2–3 weeks of an autoflower’s life represent a large percentage of its total veg time. Overwatering during seedling stage is particularly costly because there is no time to recover and extend veg.
- Same pH targets apply: Soil: 6.0–7.0. Coco: 5.5–6.1. Hydro: 5.5–6.0. There are no special pH considerations for autoflowers.
Nutrient Feeding Schedule: When to Feed vs. Water
| Medium | Feeding Pattern | Reason | Runoff EC Monitoring |
|---|---|---|---|
| Coco Coir | Nutrients at every watering (full feed every time) | Coco has no buffering capacity; no stored nutrients; roots depend entirely on feed solution | Runoff EC should be within 0.3 of input EC; higher = salt buildup |
| Soil (synthetic nutrients) | Feed every 2nd or 3rd watering; plain pH’d water in between | Soil buffers and holds nutrients; plain water waterings prevent salt accumulation | Check monthly; plain water flush if runoff EC exceeds input EC by >0.5 |
| Organic / Living Soil | Plain pH’d water only; top-dress with amendments if deficiency observed | Microbial ecosystem converts organic matter to plant-available nutrients continuously | Less relevant; EC testing less applicable to soil biology approach |
| DWC / Hydroponics | Continuous nutrient solution; top up reservoir as plants drink | No medium to buffer or store nutrients; roots are always in contact with feed solution | Reservoir EC should stay within target range; adjust with plain water or nutrient additions |