


- Autoflowering strains are strongly recommended for first-time growers: they complete seed-to-harvest in 10–14 weeks, require no light schedule changes, and are more forgiving of beginner mistakes.
- The most common first-grow killer is overwatering — more cannabis plants die from too much water than any other single cause, including light problems or nutrient deficiencies.
- A functional beginner setup starts at $150–$250 for a micro-grow; a proper 4×4 ft tent setup with quality LED costs $600–$1,200 and produces significantly better results.
- pH management is the most underestimated beginner task — maintaining 6.0–7.0 pH in soil is essential for proper nutrient uptake and prevents most apparent “deficiency” symptoms.
- Most first-time growers harvest too early — waiting until 70–90% of trichomes are cloudy-amber maximises potency and yield.
- Drying at 60–65°F with 55–60% RH for 10–14 days, followed by 2–4 weeks of curing in sealed jars, transforms the smoking quality from harsh to smooth and complex.
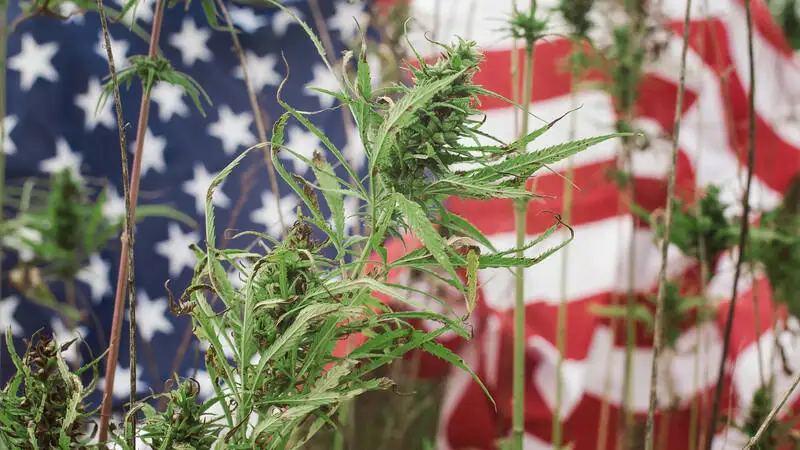
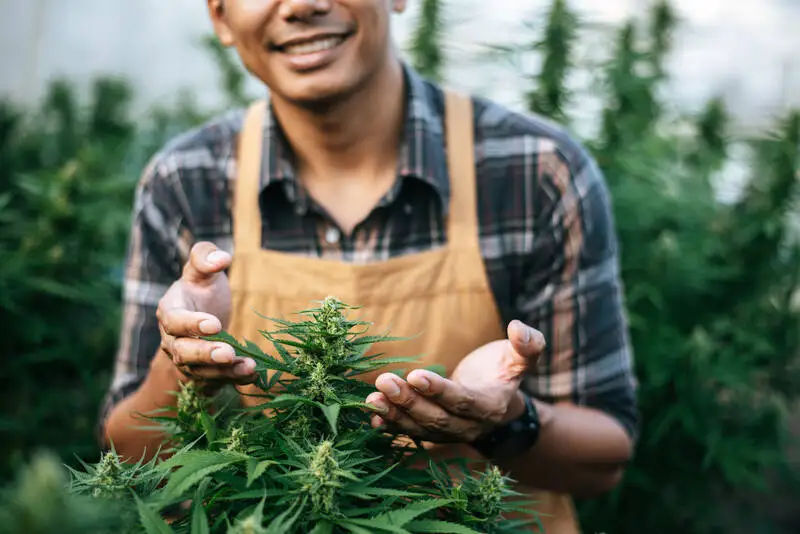
- Home cultivation is legal for adults in most US states but regulations on plant counts vary — always verify local laws before purchasing seeds or equipment.
Legal Considerations: Know Your Rights Before You Grow
The first step in any home growing journey is understanding the legal landscape in your specific location. The legal status of home cannabis cultivation varies significantly across the United States — and varies even more dramatically internationally. Getting this wrong can result in serious legal consequences even in states where cannabis is broadly legal for adult use, so this is genuinely the most important first step before spending any money on equipment or seeds.
In the United States, most adult-use states permit some form of home cultivation. The most common allowance is 3–6 plants per adult with a household cap of 6–12 plants regardless of how many adults reside there. Some states allow medical patients additional plants beyond the recreational limit. A small number of states that have fully legalised adult-use cannabis (including New Jersey and parts of others) still prohibit or heavily restrict home cultivation. Check the state-by-state laws directory for specific plant limits and any additional local municipal restrictions that may apply in your city or county — these can be more restrictive than state law.
Internationally, the legal situation is highly variable. Canada permits adults to grow up to 4 plants per residence under federal law. Several European countries have limited personal cultivation allowances (Germany now permits up to 3 plants per adult for personal use as of legislation passed in 2024). Most of Asia, Latin America, and Africa maintain strict prohibition of home cultivation. Always research both national and local regulations — the consequences of illegal cultivation vary from minor to severe depending on jurisdiction. The NORML state laws database is an authoritative resource for US state cultivation rules.
Beyond legal plant limits, consider practical legal precautions even where home growing is permitted: keep plants out of public view (most states legally require this), secure your grow from access by minors, and be aware that transporting harvested cannabis across state lines remains federally illegal regardless of the legal status in states you’re travelling between.
Equipment Budget Tiers: What You Actually Need at Each Price Point
One of the most common beginner questions is how much to spend on an initial setup. The honest answer is that your equipment budget should be scaled to your commitment level and available space. Starting cheap and scaling up after a successful first grow is a legitimate approach — but there are minimum quality thresholds below which results become unreliable. The following budget tiers represent genuine categories of setups with honest expectations for what each can produce.
Budget Tier 1: Micro-Grow ($150–$250)
This tier covers a single-plant grow in a repurposed closet or space-bucket, using CFL or a basic small LED panel. You will not produce large quantities at this budget level, but you can absolutely produce quality cannabis and gain invaluable experience. Expected yield: 0.5–1.5 oz per plant depending on strain, training, and environment management.
| Item | Budget Tier 1 | Notes |
|---|---|---|
| Grow Space | Closet / cardboard box (free–$10) | Line with reflective Mylar or white paint |
| Light | 100W CFL or 50–100W LED panel ($30–$70) | Aim for 2,700K spectrum for flowering |
| Fan | Small desk fan ($15–$30) | No carbon filter at this budget tier |
| Pot + Soil | 3–5 gallon pot + quality mix ($15–$30) | Fox Farm or similar pre-amended mix |
| Nutrients (basic) | Starter 2-part nutrient kit ($20–$40) | Dyna-Gro Grow + Bloom is reliable and cheap |
| pH meter + strips | pH strips + basic meter ($15–$25) | pH accuracy is critical even at this tier |
| Seeds | 1–3 autoflower seeds ($15–$40) | Autoflower recommended for simplicity |
| Total | $110–$245 | — |
Budget Tier 2: Proper Beginner Setup ($400–$700)
This tier adds a purpose-built grow tent, a quality LED panel, and proper odour control — the difference in results compared to Tier 1 is dramatic. Consistent temperature, humidity, and light distribution from a proper tent setup transforms grow quality and makes environmental management much easier. Expected yield: 2–6 oz per cycle from a 2×4 tent with 2–4 plants.
| Item | Budget Tier 2 | Notes |
|---|---|---|
| Grow Tent | 2×4 ft tent ($60–$90) | AC Infinity, Mars Hydro, or Vivosun brands |
| LED Light | 200–300W true draw quantum board ($120–$200) | Spider Farmer SF-2000 or equivalent |
| Inline Fan + Carbon Filter | 4-inch kit ($80–$130) | AC Infinity CLOUDLINE T4 is best in class |
| Clip Fans (2) | 2 small oscillating fans ($25–$45) | Position at opposite corners |
| Pots + Soil | 5-gal fabric pots + quality soil ($30–$50) | 2–4 pots for 2×4 tent |
| Nutrients | Basic 3-part kit ($40–$80) | General Hydroponics Flora Trio covers all stages |
| pH + EC Meters | Digital combo ($35–$60) | Apera or Bluelab recommended |
| Timer | Digital outlet timer ($15–$25) | Only needed for photoperiod strains |
| Seeds | 2–4 quality seeds ($20–$60) | Buy feminized or autoflower |
| Total | $425–$740 | — |
Budget Tier 3: Optimised Beginner Setup ($800–$1,500+)
At this tier, you invest in a 4×4 tent, a premium LED in the 400–600W true-draw range, automated fan controller, dehumidifier, and quality meters. This setup eliminates most beginner environmental management challenges through automation and provides infrastructure for consistent grow-over-grow improvement. Expected yield: 5–14 oz per 4×4 cycle with proper technique. This is the tier where home growing becomes genuinely economical compared to purchasing at retail prices.
Seed vs Clone: Which Should a Beginner Start With?
Beginning growers face a fundamental choice: start from seeds or obtain a clone (a rooted cutting from a known mother plant). Each option has genuine advantages, and the best choice depends on what’s available to you legally and practically in your location.
Seeds: Accessible and Predictable
Seeds are available from licensed online seed banks and, in adult-use states, often directly from licensed dispensaries. Feminized seeds (bred to produce only female plants) are strongly recommended for beginners — regular seeds have a roughly 50% chance of producing male plants, which don’t produce harvestable buds and must be identified and removed before they pollinate your females. Autoflowering feminized seeds combine the advantages of automatic flowering with guaranteed female genetics, making them the single easiest option for a first grow.
Starting from seed means your grow timeline is longer (seeds add 1–3 weeks to your total cycle time versus starting from a rooted clone), but seeds carry no disease, pests, or environmental pathogens from a previous grow — a significant advantage when you’re setting up a new grow space. Good seed genetics from reputable breeders are consistent in their phenotype expression, making it easier to follow strain-specific cultivation advice. Explore the cannabis strain guide for detailed growing information on hundreds of popular strains, including difficulty ratings and ideal indoor parameters.
Clones: Skip Seedling Stage, But Know Your Source
Clones are rooted cuttings from an established female plant. They save 2–4 weeks of grow time, guarantee the genetic match to the donor plant (no phenotype variation), and are often available from licensed dispensaries in legal states. The primary risk with clones from unknown sources is introducing pests (particularly spider mites and broad mites, both of which are difficult to eradicate once established) or diseases (powdery mildew, root rot) into your pristine grow space. If obtaining clones from a dispensary, inspect them carefully under bright light for any signs of pest damage, unusual spotting, or powdery residue before introducing them to your grow space. For a first grow in a new space, starting from seeds purchased from a reputable seed bank generally carries less risk.
Germination: The Paper Towel Method Step by Step
Cannabis germination is the process of activating the seed embryo and producing the initial tap root that will anchor and feed your plant throughout its life. The paper towel method is reliable, inexpensive, and allows visual confirmation of successful germination before committing a seed to your growing medium. Germination rates for quality seeds from reputable breeders run 85–98% with this method.
Paper Towel Germination: Step-by-Step Protocol
- Soak seeds in a glass of plain, room-temperature water (pH 6.5–7.0) for 12–18 hours. Seeds that sink are viable; seeds that still float after 12 hours are less likely to germinate but can still be attempted.
- Wet two paper towels with clean, room-temperature water (not cold, not hot). Wring lightly — the towels should be damp, not dripping. Excess moisture promotes mould on seeds.
- Place soaked seeds on one paper towel with at least 1 inch of space between seeds. Fold the second damp towel over the top to cover the seeds completely.
- Place the paper towel seed packet between two clean plates or inside a sealed zip-lock bag to maintain moisture, and store in a warm location (75–85°F / 24–29°C is ideal). A seedling heat mat set to 78°F improves germination speed and success rates significantly.
- Check seeds every 12–24 hours. Re-moisten towels with a spray bottle if they begin to dry. Most quality seeds show a tap root (white tail) within 24–72 hours. Some strains or older seeds can take up to 5–7 days.
- Once the tap root reaches 5–15mm (0.25–0.5 inch), the seed is ready to plant. Handle germinated seeds by the seed casing only — never touch the tap root, as even brief handling can damage this fragile tissue.
- Plant tap-root-down in pre-moistened growing medium at 0.5–1 cm depth. Cover lightly with medium and create a humidity dome (a clear plastic cup works well) to maintain moisture around the seedling until it emerges.
Direct-to-Medium Alternative
Many experienced growers prefer planting seeds directly into pre-moistened growing medium without a pre-soak or paper towel step. Place the seed 0.5–1 cm deep with the pointed end up, cover, moisten the surface, and maintain the medium at 77–82°F. Seedlings typically emerge within 3–7 days. This method avoids the transplant shock risk inherent in the paper towel method, though it provides no visual confirmation of germination before soil placement.
Seedling Care: The First Two Weeks
The seedling stage (approximately the first 2–3 weeks after emergence) is both the most delicate period in the cannabis life cycle and the period where most beginner mistakes occur. Seedlings have an underdeveloped root system, limited nutrient reserves, and are highly susceptible to overwatering, over-feeding, and light burn. The primary rule during this stage is restraint: less water, less nutrient, less light intensity, more patience.
Ideal seedling conditions: temperature 70–80°F (21–27°C), humidity 65–80% RH (use a humidity dome to maintain this), and a light at reduced intensity or height (50–75% power for LED, or T5 fluorescent which is ideal for seedlings). Water only when the top 0.5 inch of medium is dry — at seedling stage, a 16 oz cup of water every 2–3 days is often sufficient for a small container. Overwatered seedlings show drooping, yellowing, and eventually stem rot. Underwatered seedlings wilt and then rapidly recover after watering — this is much less damaging than overwatering and easier to diagnose.
Do not add nutrients during the first 1–2 weeks if using a pre-amended cannabis soil like Fox Farm Ocean Forest — these mixes contain sufficient nutrition for early seedling growth and adding additional nutrients causes fertilizer burn. Begin light nutrient supplementation only after the seedling has developed its second true set of leaves (4–6 node stage), and start at 25–50% of the manufacturer’s recommended dose.
Seedling to Vegetative Transition
Seedlings transition to the vegetative growth stage approximately 2–3 weeks after germination, marked by noticeably faster growth rate and the development of full-size leaves with serrated leaflets. At this point, increase light intensity gradually (75–100% power for LED, adjust height per manufacturer PPFD recommendations), raise nutrients to 50–75% of the recommended dose, and reduce humidity slightly to 55–65% RH. This is also the time to begin training techniques like LST if you plan to use them — branches are pliable and responsive to bending at this stage.
Vegetative Stage: Building the Framework for Your Harvest
The vegetative stage is when your cannabis plants build the structural framework that will support their flower development. Under 18/6 light (18 hours on, 6 hours off), most photoperiod strains grow rapidly, adding nodes, branches, and root mass that directly determine the number of flowering sites available during the bloom phase. Autoflowering strains will transition to flowering on their own genetic schedule, typically around 3–5 weeks from germination regardless of light schedule — this is why training autoflowers requires more urgency than training photoperiods.
Vegetative stage duration for photoperiod strains is entirely under your control — you maintain this stage until you flip the light schedule to 12/12. Most indoor photoperiod grows veg for 4–8 weeks. Shorter veg times produce smaller plants and lower yields; longer veg times allow more canopy development and training before the fixed 8–12 week flowering period. The general rule of thumb is to flip to 12/12 when your plant has filled approximately half to two-thirds of your intended canopy space, accounting for the stretch that occurs in the first 2–3 weeks of flowering (most strains double to triple in height during the flowering stretch).
Key vegetative stage tasks include monitoring pH (6.0–7.0 in soil, 5.5–6.5 in coco/hydro), implementing training techniques (LST, topping, FIM), escalating nutrients gradually following manufacturer guidelines, monitoring for early signs of pest or pathogen issues, and keeping a grow journal with daily observations. Learn more about common growing problems and how to identify them in the cannabis growing problems guide.
Vegetative to Flower Transition: Triggering and Managing the Flip
For photoperiod cannabis strains, the transition from vegetative growth to flowering is triggered by changing the light schedule from 18/6 to 12/12. This light change mimics the shortening days of late summer/early autumn that signal to the plant that its growing season is ending — prompting it to begin reproductive development (flower production). The first 2–3 weeks after flipping are called the “flowering stretch,” during which most strains rapidly elongate, sometimes doubling or tripling in height.
Two to three weeks before your planned flip, prepare by:
- Completing all major training — avoid high-stress training (topping, manifolding) in the final week of veg to allow recovery time before the flip.
- Transitioning nutrients from grow (higher nitrogen) to a bloom formula (higher phosphorus and potassium) — most manufacturers produce grow and bloom formulas for exactly this transition.
- Verifying light schedule timer reliability — a single missed or extended dark period during flowering can cause revegetation, hermaphroditism, or significant bud set disruption in sensitive strains.
- Installing or checking your SCROG net if using one — the screen should be 70–80% filled before the flip.
Pre-flowers typically appear 7–14 days after flipping and mark the definitive transition to flowering mode. Female pre-flowers show a small white hair (pistil) emerging from a calyx at node junctions. Male pre-flowers show small ball clusters. Remove any males immediately if they appear, as a single male can pollinate your entire crop within 24–48 hours of releasing pollen — this is why feminized seeds are strongly recommended for beginners.
Harvest Signs: When to Cut for Maximum Potency
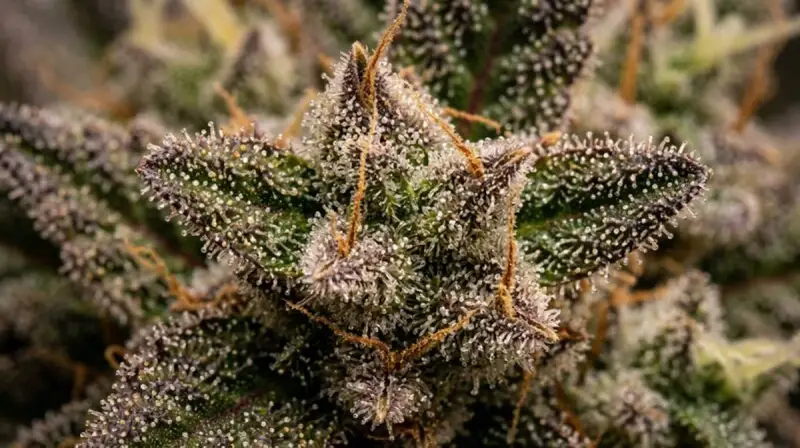
Timing the harvest is one of the most consequential and most commonly mismanaged aspects of the growing process, particularly for beginners. Cannabis that is harvested too early has lower potency, lower yield, and a harsh, anxious effect profile. Cannabis harvested at the optimal window has peak cannabinoid and terpene concentration. The primary method for determining harvest readiness is trichome examination using a jeweller’s loupe (30–60x) or a digital microscope (60–100x USB microscope available for $15–$30).
Trichome Ripeness Guide
| Trichome Appearance | Maturity Stage | Effect Profile | Harvest Decision |
|---|---|---|---|
| Clear / Transparent | Immature — pre-peak | Low potency, racy/anxious | Do not harvest — wait |
| Milky / Cloudy White | Approaching peak | High potency, energetic/cerebral | Early harvest window for sativa-dominant |
| Mostly Cloudy + 10–20% Amber | Peak potency | Maximum potency, balanced effect | Ideal harvest for most growers |
| 50% Amber | Post-peak | More sedating, heavier body effect | Harvest for indica-dominant preferences |
| Mostly Amber | Over-ripe | Very heavy, couch-lock, potential degradation | Harvest immediately — past ideal |
Also monitor pistil colour as a secondary indicator: 50–70% of white pistils have turned orange/red at the general harvest window; 80–90% turned indicates a richer harvest. Use pistil colour as a rough guide and trichome examination as the definitive method. Most first-time growers, even knowing this, will find themselves examining trichomes and thinking “a little longer” — trust the amber percentage reading rather than your impatience.
Drying and Curing: Transforming Your Harvest into Quality Flower
Many first-time growers invest months of effort into their grow and then rush the drying and curing process, dramatically compromising the final product quality. Proper drying removes moisture from harvested buds slowly enough that chlorophyll and other compounds break down enzymatically, while curing in sealed jars allows further biochemical refinement that transforms harsh, green-smelling flower into smooth, aromatic, properly matured cannabis. These steps are not optional finishing touches — they are fundamental to the quality of what you’ve grown.
Drying Protocol
Hang whole branches (or individual buds on drying racks) in a dark space with 60–65°F (15–18°C) temperature and 55–60% relative humidity. Airflow should be gentle and indirect — do not point a fan directly at drying buds, as this causes the exterior to dry too quickly while interior moisture remains, leading to “hay” smell from trapped chlorophyll. At proper drying conditions, small branches will snap cleanly (not bend) when pressed between two fingers after 10–14 days. Faster drying (higher temp, lower humidity) produces harsher, less aromatic flower and should be avoided even when impatient.
Curing Protocol
After drying to appropriate moisture content, trim your buds (or trim before drying if wet trimming is preferred) and place in clean, airtight glass mason jars filled to 75% capacity. Open jars once or twice daily for the first week to exchange air and release excess moisture (“burping”). If significant moisture is released during burping (jars feel humid, buds feel soft), increase burping frequency or leave jars open for 30–60 minutes. After the first week, reduce burping to once every 2–3 days. Optimal cure develops over 2–4 weeks, with 4–8 weeks producing noticeably smoother, more complex flavour. Properly cured cannabis stored in a cool, dark location in sealed glass can maintain quality for 6–12+ months.
Top 5 Beginner Mistakes — and How to Avoid Them
After extensive observation of first-time growers, the same five mistakes account for the majority of disappointing first-grow outcomes. Understanding these pitfalls in advance dramatically increases the probability of a successful first harvest.
| Mistake | Why It Happens | Symptoms | Prevention |
|---|---|---|---|
| Overwatering | Belief that more water = more growth | Drooping, yellowing, root rot | Water only when top inch of soil is dry; lift pot to feel weight |
| Over-feeding nutrients | Assuming more nutrients = faster growth | Nutrient burn (brown leaf tips), lockout | Start at 25–50% recommended dose; increase gradually |
| Ignoring pH | pH seems technical and unnecessary | Multiple nutrient deficiency symptoms simultaneously | Check and adjust pH every watering; soil target 6.0–7.0 |
| Inadequate lighting | Underestimating how much light cannabis needs | Stretchy stems, airy buds, low potency | Invest in proper wattage; check true draw not equivalent wattage |
| Harvesting too early | Impatience after months of waiting | Low potency, harsh taste, anxious effects | Use jeweller’s loupe; wait for 10–30% amber trichomes |
Realistic First-Grow Expectations
A realistic first grow with a proper beginner setup (Tier 2 or Tier 3 equipment, quality autoflowering or feminized seeds, and reasonably diligent management) can produce 1–6 oz of dried, cured flower per plant. Most first-time growers fall in the 1–3 oz range, which is a meaningful quantity representing real value. Do not expect to produce dispensary-quality product on your first grow — the skills involved in growing truly exceptional cannabis develop over multiple cycles. What your first grow will definitely produce is invaluable practical knowledge, a deeper appreciation for the craft, and a solid foundation for significant improvement on your second cycle. View your first grow as paid education with a harvest bonus at the end. Learn from the detailed notes you keep in your grow journal and apply those lessons to your next setup. Explore the full beginner mistakes guide for additional detail on troubleshooting common first-grow problems.
Frequently Asked Questions: Growing Weed for Beginners
How long does it take to grow weed from seed to harvest for a beginner?
For a first-time grower, expect 14–20 weeks total from germination to dried flower. Autoflowering strains are fastest at 10–14 weeks seed to harvest with no light schedule changes required. Photoperiod strains take 16–24 weeks total: 4–8 weeks vegetative plus 8–12 weeks flowering plus 1–2 weeks drying. Factor in an additional 2–4 weeks of curing for best flavour and smoothness. Most beginners choose autoflowering strains for their first grow due to the shorter timeline and simpler management.
What is the cheapest way to start growing cannabis as a beginner?
The minimum viable beginner setup costs $150–$250: a 2×2 ft tent or closet space ($0–$60), a quality CFL or small LED panel (100W true draw, $40–$80), a small fan ($15–$30), basic soil and nutrients ($30–$60), and seeds or a clone ($10–$50). The single most important investment is light quality — underpowered lighting is the number one cause of disappointing beginner harvests.
What are the most common beginner mistakes when growing cannabis?
The top five beginner mistakes are: (1) Overwatering — more plants die from too much water than any other cause. Water only when the top inch of soil is dry. (2) Over-feeding — nutrient burn from excessive fertilizer is extremely common; start at half the recommended dose. (3) Inadequate lighting — underpowered lights produce airy, low-potency buds regardless of other factors. (4) Ignoring pH — cannabis requires 6.0–7.0 pH in soil for proper nutrient uptake; uncorrected pH causes deficiencies that mimic many other problems. (5) Harvesting too early — most beginners harvest 1–3 weeks too soon, before trichomes have fully matured.
Do I need special soil to grow cannabis?
Cannabis grows well in a high-quality, well-draining potting mix with a slightly acidic pH of 6.0–7.0. Good options include Fox Farm Ocean Forest, Roots Organics, and similar cannabis-specific mixes that come pre-amended with slow-release nutrients. Add 20–30% extra perlite to any soil mix to improve drainage and prevent overwatering issues. Purpose-made cannabis growing mixes simplify nutrition management significantly for beginners.